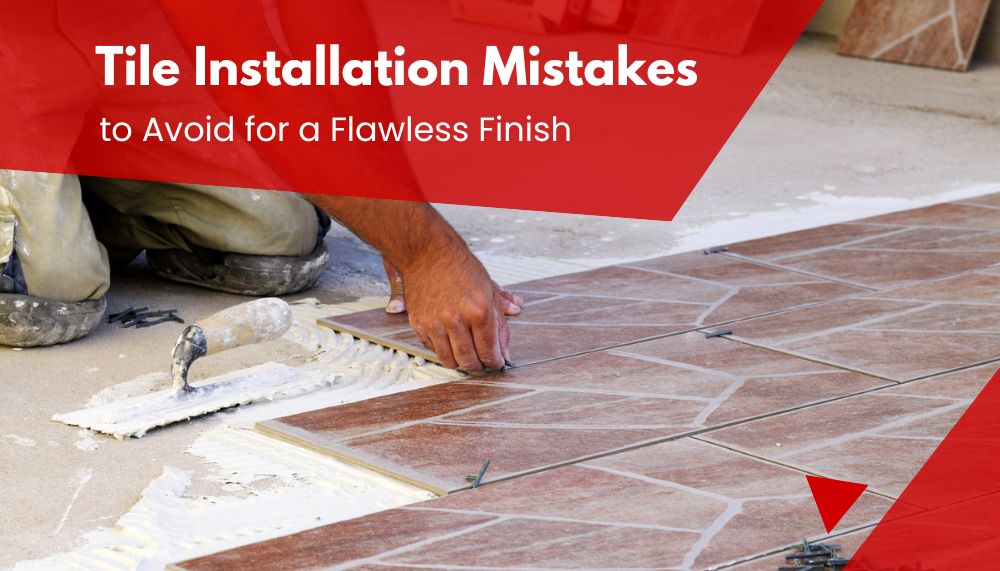
Installing tiles transforms the look of any room, adding style, durability, and easy maintenance. However, tile installation is a meticulous process that requires careful planning and execution. Even minor mistakes during installation lead to unsightly results, costly repairs, and shortened tile lifespan.
In this guide, we’ll explore common tile installation mistakes to avoid, ensuring a successful and long-lasting tile project.
Top Tile Installation Mistakes and How to Avoid Them
1. Skipping the Surface Preparation
Why it’s a mistake:
Surface preparation is one of the most important steps in tile installation. If the surface isn’t properly prepared, the tiles may not adhere correctly, leading to uneven surfaces, cracking, or loosening over time. Skipping this step results in costly repairs and an unattractive finish.
How to avoid it:
Before installing tiles, ensure that the surface is clean, dry, and level. Remove any old adhesive, paint, or debris that could interfere with the bonding process. If the surface is uneven, use a leveling compound to create a smooth, even base. Proper preparation also includes ensuring that the substrate (the surface under the tile) is stable and free from cracks or movement.
2. Ignoring the Importance of Layout Planning
Why it’s a mistake:
Jumping straight into tiling without a clear layout plan results in misaligned tiles, awkward cuts, and a poor overall appearance. Without proper planning, you might end up with tiles that don’t fit evenly, especially around edges, corners, and fixtures.
How to avoid it:
Take the time to plan your tile layout before starting the installation. Begin by measuring the area and marking the center of the room or wall. Dry-lay the tiles to see how they will fit and make adjustments as needed to avoid slivers of tiles at the edges. Use chalk lines or a laser level to guide your tile placement, ensuring that everything is aligned and symmetrical.
3. Choosing the Wrong Adhesive
Why it’s a mistake:
Not all tile adhesives are created equal, and using the wrong type compromises the integrity of your installation. The adhesive you choose must be suitable for the type of tile and the surface you’re working on. For example, using a standard adhesive for heavy tiles or wet areas like bathrooms leads to tiles cracking, or detaching over time.
How to avoid it:
Select the right adhesive based on the type of tile (e.g., ceramic, porcelain, natural stone) and the environment (e.g., indoor, outdoor, wet areas). For heavy or large-format tiles, opt for a stronger, high-bond adhesive. For wet areas, use a waterproof adhesive to ensure a secure bond. Always follow the manufacturer’s instructions regarding mixing, application, and drying times.
4. Overlooking Grout Lines
Why it’s a mistake:
Grout lines are more than just a decorative element; they play a definitive role in the stability and longevity of your tile installation. Improper spacing leads to misalignment, uneven surfaces, and an increased risk of cracking. Additionally, neglecting to properly grout tiles results in water penetration, mold growth, and weakened adhesion.
How to avoid it:
Use tile spacers to maintain consistent grout lines throughout the installation. Choose the right width based on the type of tile and the look you want to achieve. After the tiles are set, carefully apply the grout, making sure it fills all the gaps completely. Wipe away excess grout with a damp sponge before it dries, and allow it to cure fully before exposing the area to water or heavy traffic.
5. Cutting Tiles Incorrectly
Why it’s a mistake:
Improper tile cutting leads to jagged edges, uneven cuts, and wasted materials. Incorrect cuts also result in poor fitment, leaving gaps or requiring excessive grout to fill the space, which diminishes the overall appearance of the finished project.
How to avoid it:
Invest in the right tools for cutting tiles, such as a wet saw for large tiles and a tile cutter for smaller pieces. Measure carefully before making any cuts, and take your time to ensure precision. If you’re working with delicate or expensive tiles, practice on a spare piece first to avoid costly mistakes. For complex cuts around fixtures or outlets, consider using a tile nipper or a hole saw.
6. Not Accounting for Expansion Joints
Why it’s a mistake:
Tiles and the underlying substrate expand and contract due to changes in temperature and humidity. Without expansion joints, the stress from this movement causes tiles to crack or pop loose, particularly in large areas or outdoor installations.
How to avoid it:
Incorporate expansion joints into your tile layout, especially for large floors, outdoor areas, or when tiling over concrete slabs. Leave a small gap around the perimeter of the tiled area and fill it with flexible caulk instead of grout. This allows for movement without compromising the integrity of the installation. Follow industry guidelines for the placement and size of expansion joints based on the area being tiled.
7. Failing to Waterproof in Wet Areas
Why it’s a mistake:
Waterproofing is essential in areas exposed to moisture, such as bathrooms, kitchens, and outdoor spaces. Failing to waterproof properly leads to water infiltration, mold growth, and structural damage, especially in showers, around bathtubs, or behind backsplashes.
How to avoid it:
Before tiling, apply a waterproof membrane or barrier to the surface. This could be a liquid-applied membrane, a sheet membrane, or a combination of both. Ensure that all seams, corners, and penetrations (like plumbing fixtures) are adequately sealed. Allow the waterproofing to cure completely before starting the tile installation to create a moisture-resistant barrier that protects your home from water damage.
8. Rushing the Installation Process
Why it’s a mistake:
Tile installation is a process that requires patience and attention to detail. Rushing through any step—whether it’s surface preparation, laying the tiles, or grouting results in mistakes that compromise the quality and durability of the finished product.
How to avoid it:
Take your time with each phase of the installation. Allow sufficient drying and curing times for adhesives, grout, and any waterproofing materials used. Follow the recommended working time for adhesives to avoid issues like tiles slipping out of place. If you’re working in a high-traffic area or a space that needs to be used quickly, plan your project in stages to allow for proper curing between steps.
Conclusion
Avoiding these common tile installation mistakes saves you time, money, and frustration while ensuring a beautiful, long-lasting result. Proper surface preparation, careful planning, and attention to detail at every step of the process are key to a successful tile installation.
Whether you’re tackling a small DIY project or working with a professional installer, keeping these tips in mind will help you achieve a flawless finish that enhances the beauty and functionality of your space for years to come.
You May Also Like:
